February 16, 2021 by IG
Favorite Gardening Implements
Gardening involves a lot of trial and error, from plant selection to watering and picking the right tools for the job. Having the right materials can make gardening easier and more fun. I’ve made some mistakes: bought shovels and weeders I barely use, chose potting mix that was too heavy for potted plants, and wasted money on plastic planters that are both flimsy and an eye sore. But I’ve also discovered some products that I really love and want to recommend to other gardens.
Growease Seed Starter Kit (24 cell)
It’s nice to have a product that isn’t made to be disposable. The tray and planting cells are made of thick, sturdy plastic and are dishwasher safe (although I’d recommend pre-rinsing so as not to clog the dishwasher with peat and perlite.)
The capillary mat keeps seed starting mix perfectly moistened so I never have to worry about seed germination aborting from accidentally letting the seed starting mix dry out. As the seedlings grow, I fill up the reservoir from time to time without having to think about over or under-watering or having to dump excess water from the tray. The cells are a generous size so many seedlings can be grown in them right up to transplanting into the garden and the extra step of potting up to larger containers isn’t always necessary. Although, tomatoes will outgrow even these cells within a few weeks.
Jiffy Seed Starting Mix
This is a relatively inexpensive seed starting mix that has very fine particles that are easy to maneuver for tender roots. It works very well with the Growease seed starting system, holding just the right amount of water. I’ve never overwatered a plant in this mix. I’ve also used the self watering trays and Jiffy mix for rooting lavender and dahlia cuttings. And I use the Jiffy mix as an intermediate substrate for cuttings that have been rooted in water. There is much less adjustment for the roots going from water to this mix than straight into potting mix or garden soil.
Garden Auger and Memory Foam Kneeling Pad
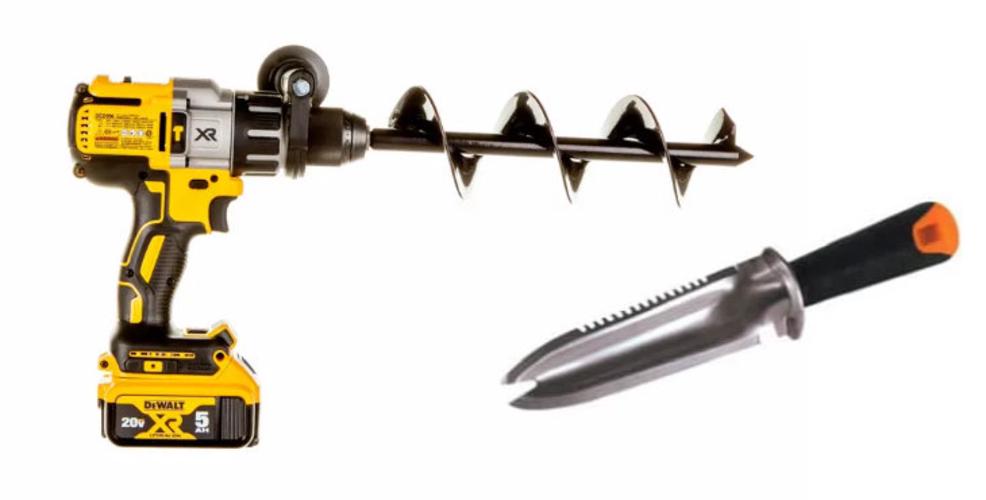
Two years ago I went a little nuts with ordering bulbs and tried out various techniques for planting them. The easiest for me turned out to be using a drill with an auger attachment. I found a 9” long auger easy to use, but my old kneeling pad wasn’t comfortable enough for the hours I spent sitting, kneeling, and otherwise contorting to plant the bulbs. Once I got the memory foam pad, I was able to focus on the job at hand, rather than bruised knees or chilly backside. While I have not tried a longer auger, I’m not planning to any time soon. I have a feeling that hunching over for hours will be even more uncomfortable.
When shopping for an auger, make sure the diameter is wide enough for your biggest bulbs. My auger is 1.75”, which turned out to be too small for half my bulbs and I had to spend time enlarging the holes.
Hori Hori Knife
Probably the most versatile gardening tool I own is a hori hori knife. Hori hori knives are useful in a variety of tasks like digging, cutting small tree roots, splitting perennials, opening bags of soil, weeding, and maneuvering plants out of pots. There are many versions of this hand tool on the market. They all have one smooth cutting edge and one serrated edge and are concave in one direction. Some also have ruled markings, useful for planting bulbs. The Fiskars Big Grip Garden Knife has a bifurcated tip which is good for digging out weeds like dandelions. Since I got mine, I’ve used it more often than any other digging tool. To plant bulbs or plug size plants, I plunge the knife into the soil and pull forward. It’s so quick. I wasn’t sure which of the many available options to buy and opted for the entry level $10 Fiskars version, thinking I could always upgrade later, and I’ve been very happy with this small investment.
Cute Watering Cans
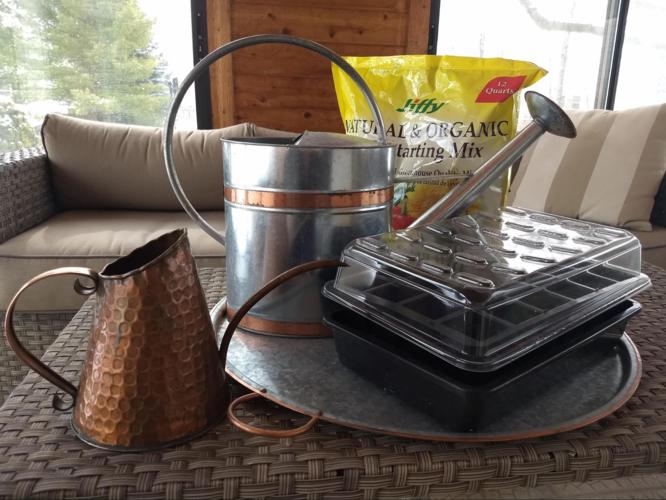
Hey, watering is a chore, so you might as well make it more pleasurable. I have 2 watering cans I like to use. One is made from galvanized steel and has a 2 gallon capacity. I love the single handle design because I can use it with one hand and it’s easy to adjust balance when carrying. It’s pretty and I don’t mind leaving it out on the front porch. Makes me look like an avid gardener (which I am) rather than a person who’s too lazy to put away her tools (which I also am.) Unfortunately, I’ve had to replace this watering can several times because it rusts. But I will keep buying these until I find a durable, cute, comfortable 2 gallon watering can to replace it with.
My other watering can is a 3 pint copper beauty by Achla Designs that has held up very well. I use it for watering indoor plants. It allows me to get into tight spaces on my plant shelves and is a pleasure to look at every time I use it.
Here are some other awesome gardening implements Garden Revival members recommend:
Google Sheets
Seed organization seems to challenge new and experienced gardeners alike. Some types of seeds have a longer shelf life than others, and some storage methods can help stretch that time out even further - but I’m not going to talk about that.
How do you plan your next planting without pawing through all your seed packets? How do you know where to find the seeds that you have carefully stored away? What if someone tells you they have a plant cutting or seed that you have been coveting and wants to know what you have to swap?
The answer: Catalog your seeds on a shareable spreadsheet. I use Google Sheets. It’s similar to Microsoft Excel, but doesn’t have all the same bells and whistles (you don’t need them for this!) After creating your sheet, you can get a view-only link to share with any swappers.
I’m still filling in some blanks, but I cataloged my entire collection while in front of the TV binge watching Veep. It took some time to decide what I wanted to record. This caused me to have to go back and fill in information that I didn’t input on the first pass, so I suggest deciding what to track before you begin.
Here is some information you may want to record in your catalog:
- Source — Where did you get the seeds from?
- Brand
- Category — I store seeds by category, so this is very helpful for location
- Type — Can be more specific than Category if you are grouping like items by Category
- Variety
- Latin Name
- URL — link to online seed catalog entry
- Container — Seed packet, plain envelope, etc.
- When to Plant
- Planting Tips
- Germination Days
- Plant Apart
- Plant Height
- Plant Width
- Days to Maturity
Link to my seed list.
If you’re curious how I store my seeds, I use the method described on the Homestead and Chill blog.
— Alysylum
Japanese Pruning Scissors
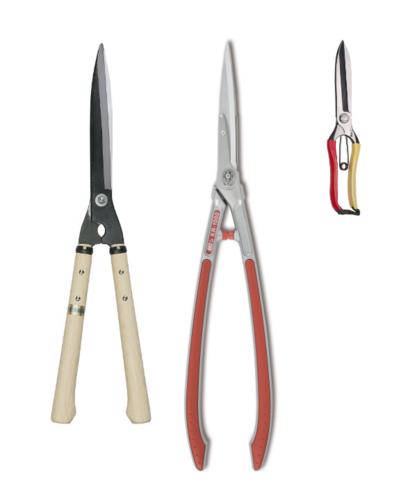
A good quality pair of Japanese pruning scissors are great to use when shaping and pruning bushes and plants. They are easy and relaxing to handle and are versatile for a variety of plant shaping. The clean cuts they provide heal over more quickly.
— Den
Hands
My favorite gardening implements would be my hands. They are quite versatile, strong and soft at the same time and could be used for many things.
— Commiseration
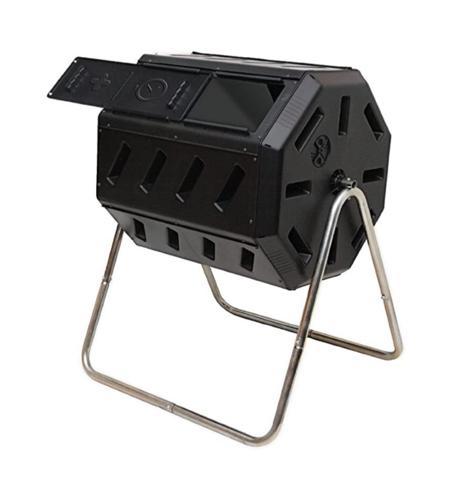
Tumbling Composter
As a newer home gardener, compost intimidated me (still kind of does), but I really wanted to make my own and save my food waste from going into garbage. This composter is great for beginners, it has two sections inside, one for all the new stuff you are adding and the other for actively decomposing material, you just switch between the two. This is the one I bought. I highly recommend it because it is easy to assemble and very good quality (a tree fell on it once and it didn’t break.)
5-10 Gallon Fabric Grow Pots
My first year gardening, I didn’t have a lot of bed space in my garden but I wanted to grow as much as I could. I bought these fabric grow pots and loved them so much, I bought more the next year. I recommend these to friends who are renting or only have a balcony for growing. They are reusable each year and easy to store. I have found that they are amazing for hot peppers, I’ll put one hot pepper plant per five gallon grow pot. There are many advantages to the wool-like material for the plants, the drainage is fantastic. I especially like that I can move them around to adjust light conditions for the plants. I also have ten gallon ones for growing potatoes, it worked so well last year, I’ll be doing that again this year. I don’t have one brand I’d point people towards, but I have noticed that the less expensive ones from Amazon degrade fast, I have some with holes in them after only one season, while the more expensive ones I purchased from my local hydroponic store are still going strong after two years.
— Elle
Hoes
I think hoes are really personal choices. Everyone has a hoe they really like…but you know, I think a hoe’s a hoe.
— Erin, The Impatient Gardener
Let’s talk hoes. No no, this is gonna be PG, I promise. Garden hoes. Pretty much every gardener’s best friend when it comes to battling weeds in your garden. But what if I told you there was something out there you were missing, something that would make your life easier, and something your back would thank you for? Allow me to introduce the Hula-Ho, sometimes referred to as an action or stirrup hoe.
Bit different from tradition isn’t it? Or maybe it isn’t, because they are so wildly popular these days, it’s difficult to even find traditional hoes in some places, and for good reason. Unlike a traditional hoe, the Hula-Ho doesn’t need to be swung wildly, as if you’re attempting to mine clay from the soil. The secret to this is both the angle the hoe implement is attached to the handle at, and the actual attachment itself. You see, when you first go to attack those pesky weeds, you may notice that it doesn’t work too well when you hack at the soil. The idea behind a Hula-Ho is that you rock it back and forth, much as its namesake implies, cutting into the soil slightly and running underneath it. This saves the back breaking labor of chopping down weeds and allows you to easily glide beneath those pesky weed seedlings, swiftly uprooting them. You extend the hoe, place a moderate amount of downward force on the handle, and cut into the soil, dragging it back towards yourself. In a similar fashion, you apply the same downward force to the handle and push it away, cutting back through the soil and returning it to the starting position.
This tool is an absolute lifesaver for the more organized gardeners among us, who plant in rows, as its shape neatly fits between the plants and allows you to swiftly saw your way down the row with little disturbance to the plants’ root structures. But what if you are not the organized gardener instagram thinks you ought to be? What if you just plop plants wherever makes you happy, or you have many perennials that you find yourself bent over every year, tirelessly plucking away? What if weeding between rows isn’t enough, and you find seedlings popping up between the plants in the rows themselves?
Allow me to introduce what is perhaps my favorite garden implement, the Carrot Design Circular Hoe.
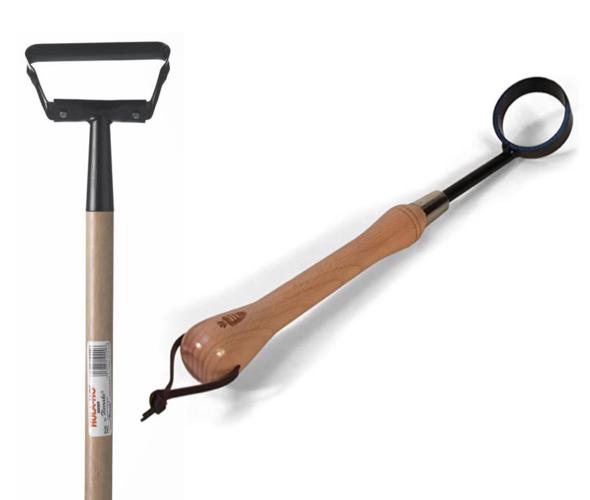
Can you use it for carrots? Probably. Is that what the technical term for this is? Who knows, probably not, but that’s what it says on the tin. The Carrot hoe is a wonderfully crafted little hand tool, specifically designed for those in-between spaces in your garden. The same principle of using the hoe remains, but the trick to this tool is that it has a sharp edge on one side of the bottom, while the sides and rear remain blunt. This lets you target those weeds that grow very close to stems and root balls, while leaving the root structure of the plant undisturbed, despite them being anxiously close to the plant. Sure, you could try to use the Hula-Ho for this, but you’ll find fairly quickly that you just don’t feel comfortable working with a tool that isn’t precise. If I were to make an analogy of the difference, this is the scalpel to the Hula-Ho’s kitchen knife.
Let’s talk about caveats. Both the Hula-Ho and its little buddy are practically useless for some well established weeds. It can be done, but you’re probably better off with other conventional weed control tools. These tools excel in prevention by nipping weed seedlings in the bud, not so much in eliminating things like established brambles or grasses. That’s not necessarily a bad thing, but you should only really rely on these hoes for beds and well kept perennials. As people say however, an ounce of prevention is worth a pound of cure.
— Ancientz
Mosspital
The mosspital is simply a moss-hospital. The mosspital consists of long-fibered sphagnum moss, a container and a light source. The idea of the mosspital is not novel—in truth, there are many gardeners who use this method as a means of propagating cuttings. In my experience, this method can be extended to rescuing plants, aiding young plants, and also allowing a neglectful gardener to keep their plants alive!
A mosspital doesn’t need to be expensive. The cheapest set-up can be made for under $15. Our three necessary items are:
- Long-fibered sphagnum moss. It isn’t necessary to spend top dollar for these purposes. You may find long-fibered sphagnum moss at big box gardening centers and pet stores for $5.
- A container. This can be found at dollar stores and also superstores for $1+ depending on the size. While you may find work-arounds, I highly suggest getting a clear lid unless you plan on cutting holes and managing humidity.
- Light source. I use a grow light as my light source, but there are some gardeners that use indirect sunlight with varied success.
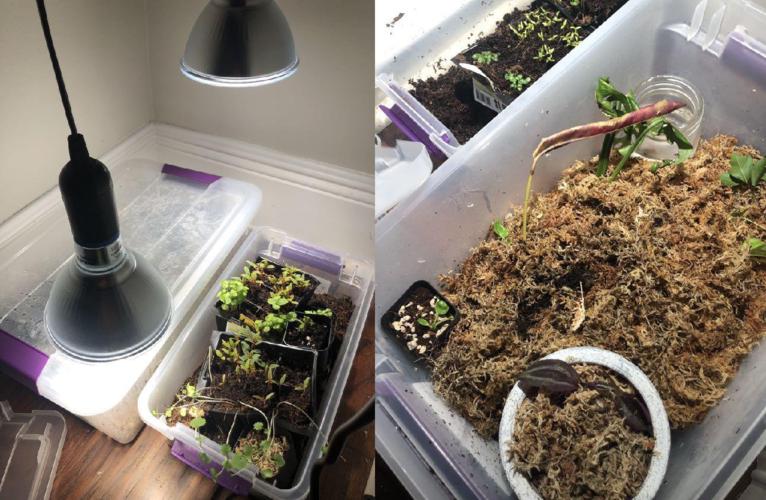
My mosspital doesn’t look glamorous and even has the unglamorous setting of my closet! As you can see in my photo, my mosspital contains various plants that are somewhat tossed around. You can see my (dead) Calathea, Tradescantia zebrina, Pilea peperomioides, and Monstera adansonii. I have found that the mosspital is most hospitable to plants that enjoy high humidity when the lid is closed. This means most succulents would probably rot and not enjoy this setting. I have had success bringing Monstera back from the brink, and even propagating cuttings in my mosspital.
During this pandemic, I haven’t always been able to care for my tropical plants and sometimes overwatering after neglect has put high stress on them. The mosspital has been helpful in both retaining my plants and propagating new plants. I hope you all give this method a try, because it is my favorite pandemic project!
— Xenogerm
