April 18, 2024 by MeatsackJimmy
Photography for Gardeners: Showing off your Harvests
Hi, all!
I’m MeatsackJimmy, the one with all the overly extra photos in the Discord server. I’m here to talk about how to make some simple tweaks to your cut flower and other harvest photo taking in order to get beautiful results. So let’s get started!
A little about me:
I’ve been a hobbyist, sometimes semi-pro photographer since about 2007, and while my primary focus is on fine art and portraiture, I very much also enjoy shooting florals and garden photos. You can check me out on my photography Instagram at @theandreaborden, or my craft Instagram account, @takephotosmakethings.
As I’ve posted some photos from my homegrown flora, I’ve gotten some questions on how some images have been made. So, here are my top four tips for better photos of your foliage-y friends this season!
Find a spot with natural light.
This can be a nice light filled window or a porch on a sunny day, or a spot outdoors on an overcast day.
Cloudy days can make for fantastic photos! The key is making sure you can use the light to your advantage. My suggestion would be to get a reflector, or use a white foam board to bounce light back onto your subject, and use window light to your advantage, especially diffused light like on cloudy days.
Have you ever bought flatpack furniture and gotten those white foam sheets that help keep your new items safe in transit? Those are perfect for reflecting natural light back towards your photo subject.
Here’s a great video about using reflectors and photographing objects with those kinds of conditions. It’s a video about food photography, but the same principles apply. Styrofoam as a reflector board is the one item I use every single time I take photos. Here’s an example of that.
Spend a minute to consider your setup.
When gardening, it’s easy to get so enthusiastic about taking photos of the fruits of our labor, we forget about the setting we’re taking our photos in. Only after we take the photo do we sometimes realize we’ve got a distracting background, or it’s too dark or too blurry, or too far away to see the amazing detail of our most precious bounties. Take a minute when possible to see your garden snapshots as more than snapshots – think about them as an opportunity for the fruits of your labor to shine.
Try flatlays.
Doing flatlays (overhead photos) is super easy for when you want to show off the fruits of your labor in even lighting (especially if you’re using a reflector and window setup). I find that trying to photograph items outside can be a huge pain and the results don’t end up as pleasing to me unless I have someone modeling the items. That’s where flatlays come to the rescue for me.
What is a flatlay, you ask? Here’s how Nikon School puts it: “A flat lay is simply an image shot directly from above – a bird’s eye view of an array of carefully arranged objects – and it’s never been more popular, particularly in food and fashion photography.” You can read their tips for flat lay success here.
If you want to get a little fancy pantsy with flatlays, you can add in little notions and things to enhance your aesthetic, like a cup of coffee or tea, a book, your clippers, foliage and companion plants, etc. While not a requirement, these items can add a personal touch to your photos and provide some context to what is going on in your garden at the moment. Flatlays don’t need to be nice and neat and pristine, either. I love images that feel rustic and artistic.
If you have materials on hand to make setups like that, it seems like a perfect time to give flatlays a whirl!

You can also pick out certain surfaces for photo-taking for your projects, like a nice wood cutting board, a rustic serving tray, some faux vinyl contact adhesive on cardboard or foamcore, etc. None of those things are necessary but I find, sometimes, they give me just the inspiration I need that brings the photo together. I purchased this wood slat surface at Michaels a few years ago and use it frequently to keep my background looking timeless without being distracting.
Just a rule of thumb when it comes to photographing with a pre-planned background, if you’re laying your items on a surface for a ‘flatlay’ style photo, be mindful that the texture of the surface will most likely be in sharp focus in your photos. Texture can be a great element to bring to an image, and can serve as a great contrast to home grown florals, fruits, or veg.
The image below was made by threading each individual stem through rattan pinned to a wood frame. I love using rattan because it gives things a vintagey feel without being overpowering or distracting.
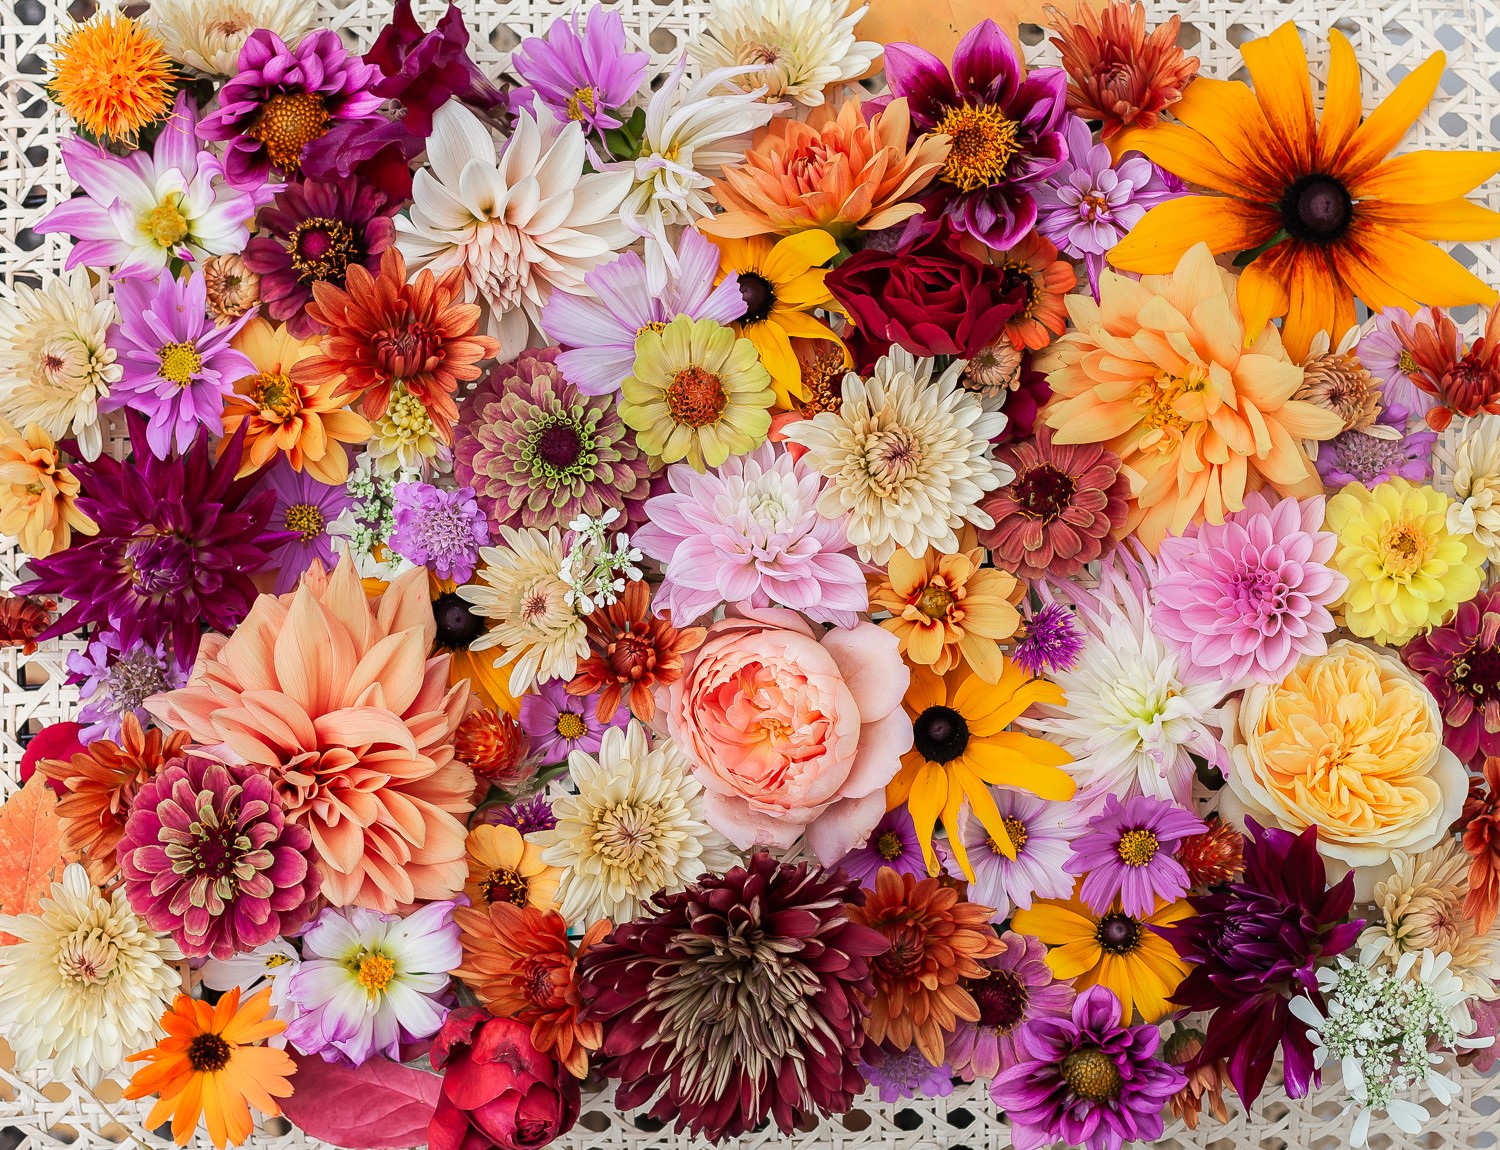
Harvest shots are the most satisfying to me when I can fill the whole image with the fruits of my labor. But what about when I simply don’t have all that much to show off?
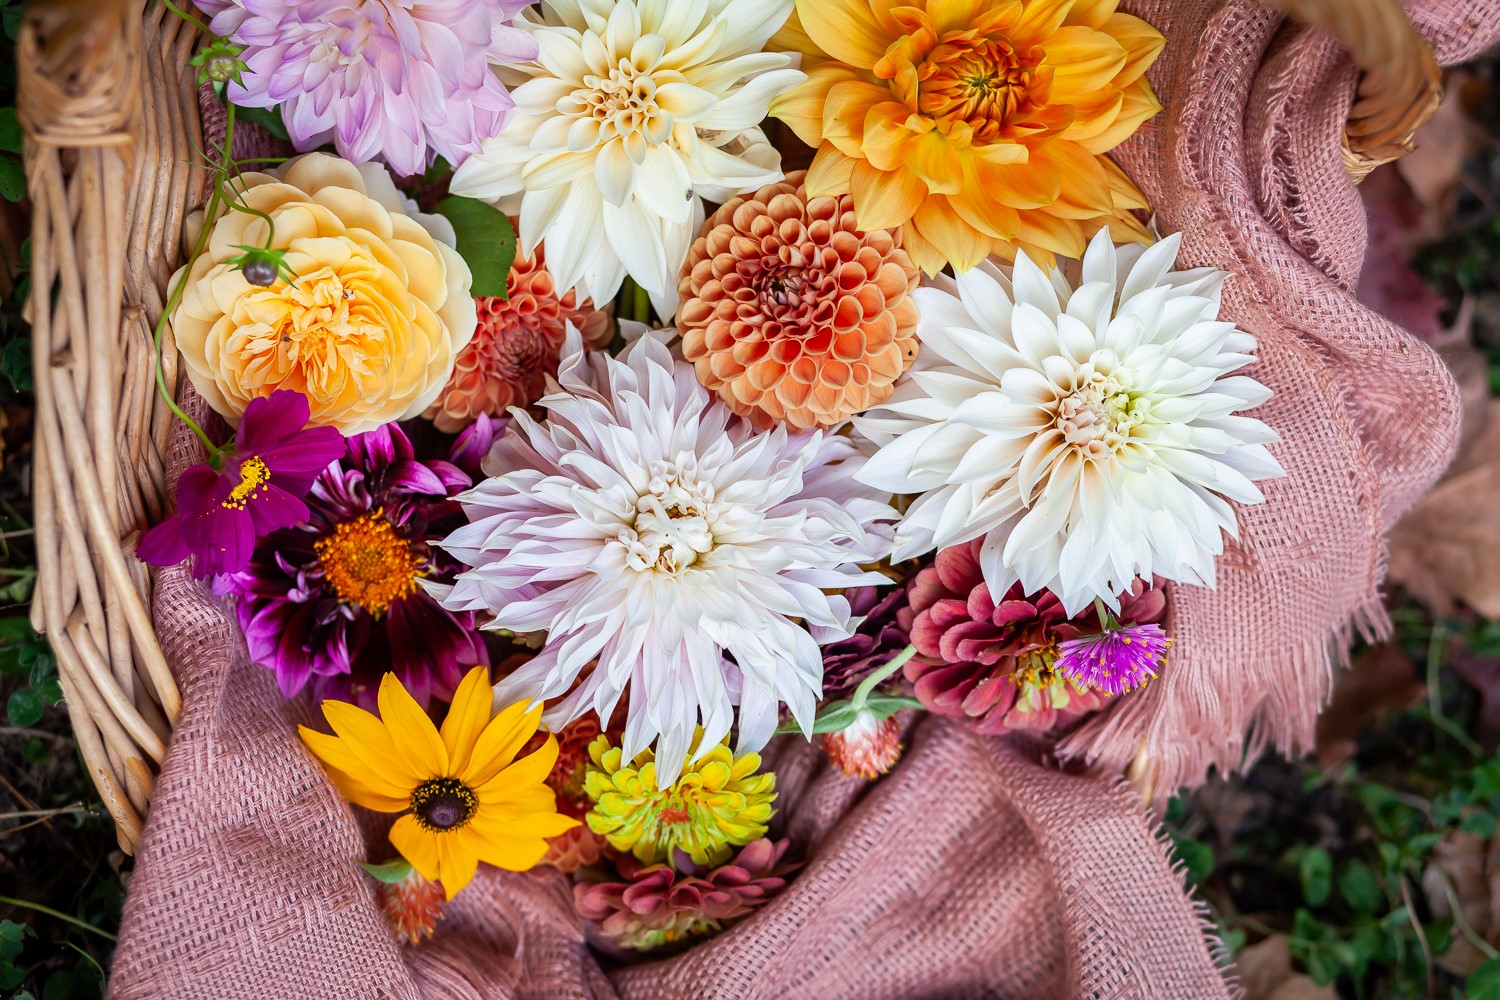
Try a basket. Get directly overhead, and fire away. Remember that trick about texture and throw in your favorite tea towel, scarf, or clean linen. Take your image in a spot with even lighting (no harsh sunlight). A shady spot on a sunny day works great here.
Some people don’t prefer flatlays. Sometimes they come off as overworked, overdone, or overplanned, but they’re a bit trendy right now for good reason — it’s easy to make them look good, they don’t require a model or extra person, and you don’t have to depend on the weather to do them.
Create Depth
If instead of a flatlay, you’re opting for a vertical setup, try using a backdrop and bring your subject closer to you and further away from your background. This will add some depth to your image and keep the focus of your photo on your planty offerings. If you want to see an example of what I mean, check out this example from It’s Always Autumn.
Pinterest can also be a source of inspiration and a resource if you need help visualizing things!
You might be thinking, “Gee, James, this sounds expensive and requires way more space than I have!” I’m here to tell you that you can do small-scale setups very cheaply, whether you’re looking for a quick photo spot, or something that looks more detail focused. Photography can be as expensive or affordable as you need it to be.
My setup for day-to-day harvests is super simple. It’s just a little wire utility shelf in my crammed mud room, roughly measuring about three feet by three feet for the overall shooting space. On the shelf, I have an artboard (basically just matboard) from the art supply store.
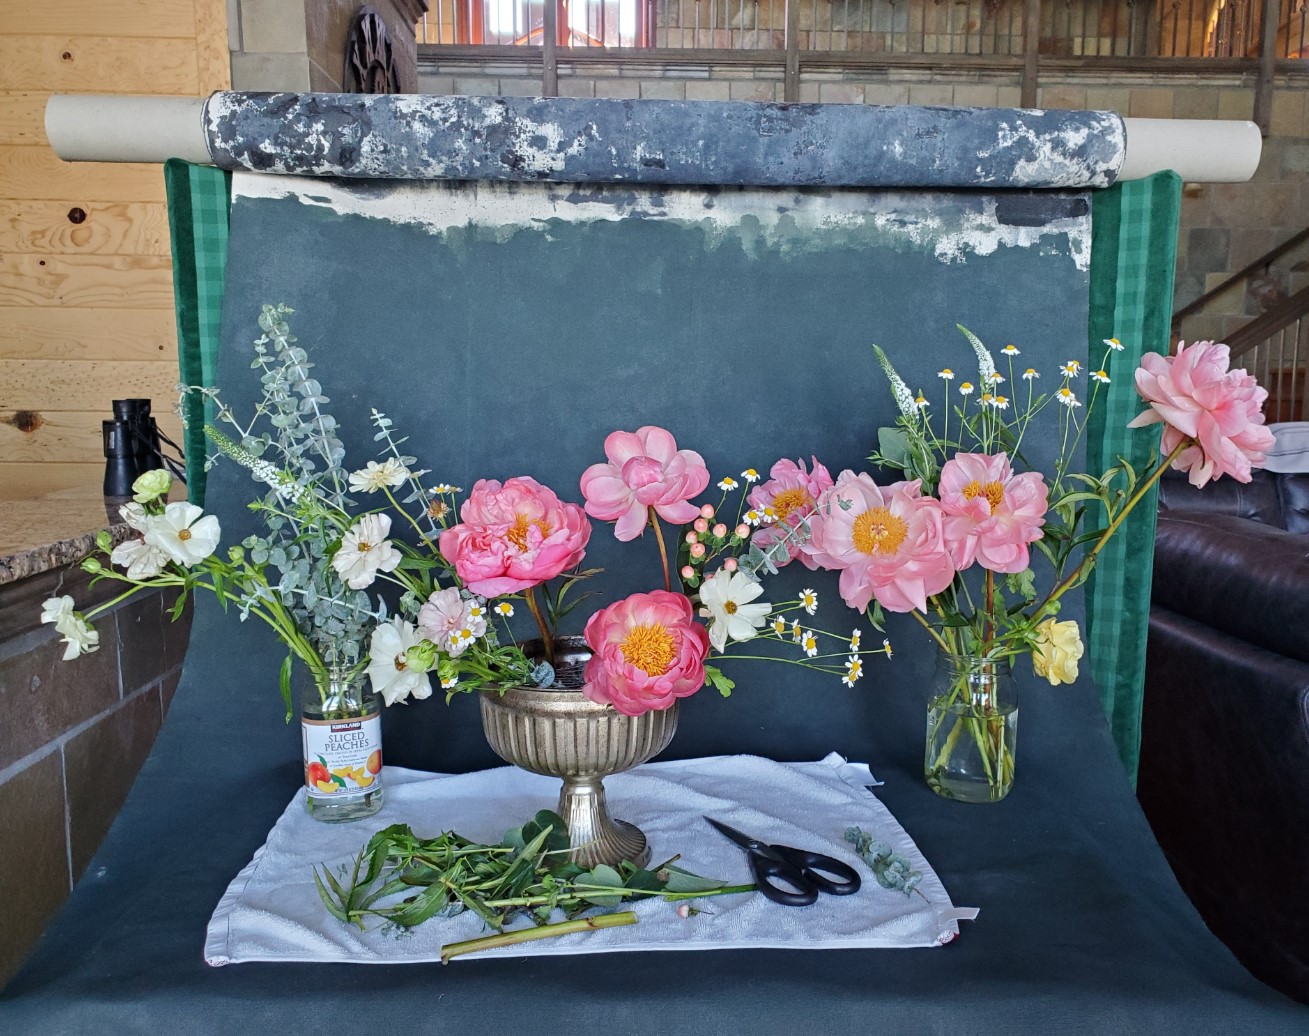
Here’s an example of what that daily setup looks like (plus an example of using a foam board to reflect light in the right hand corner):
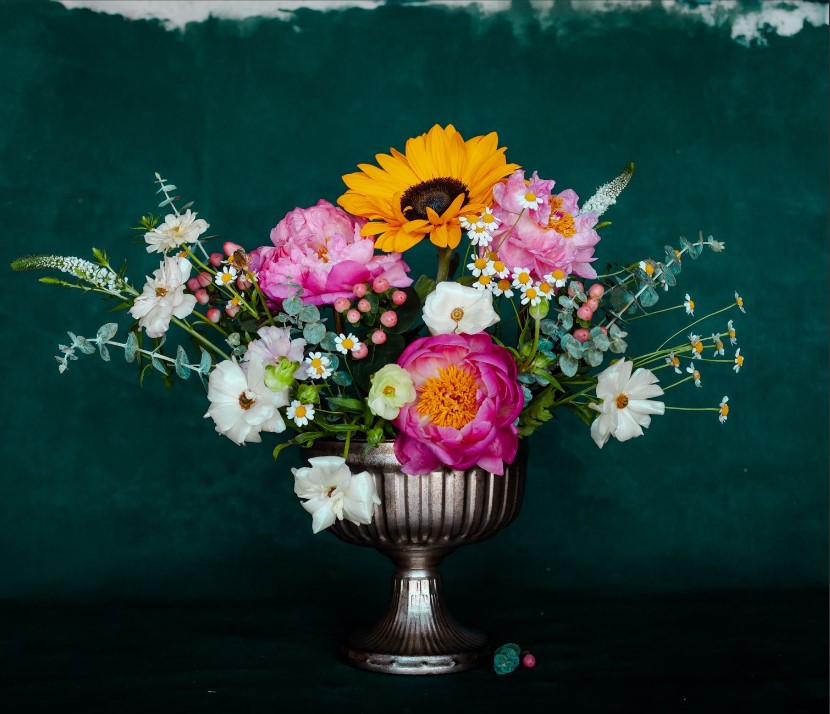
And a result from that setup:
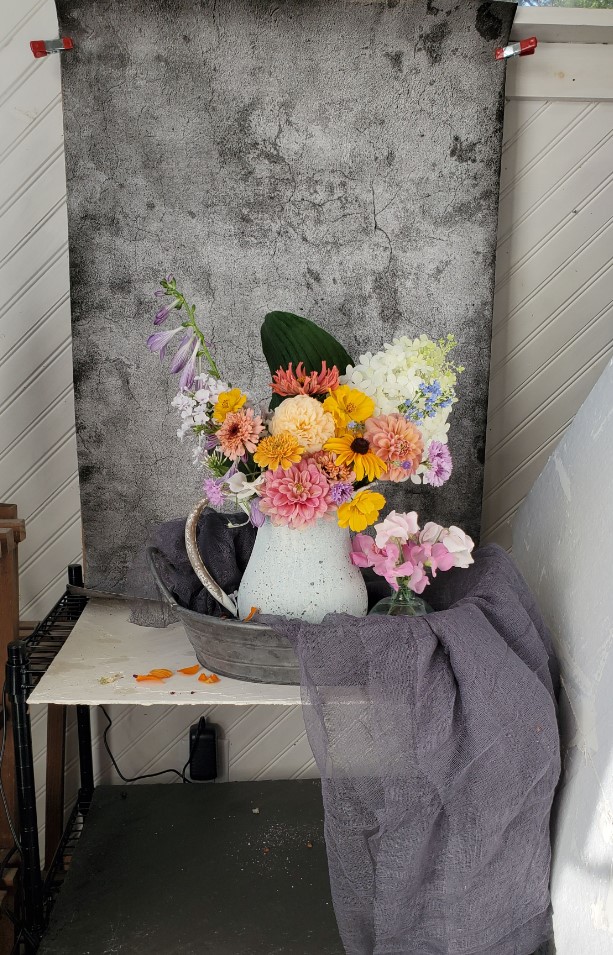
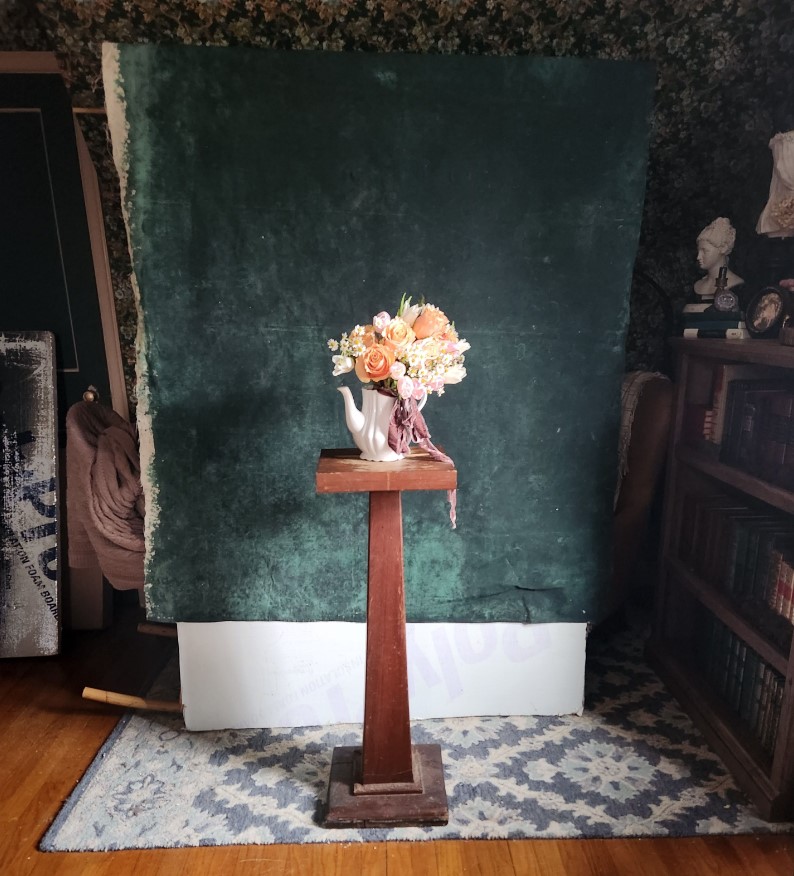
I’ve also done some setups that are a bit more involved. I use hand-painted backdrops as well, even when I’m traveling. Don’t have a backdrop stand? No worries, you can paint a canvas and set it up on a room divider, like so:
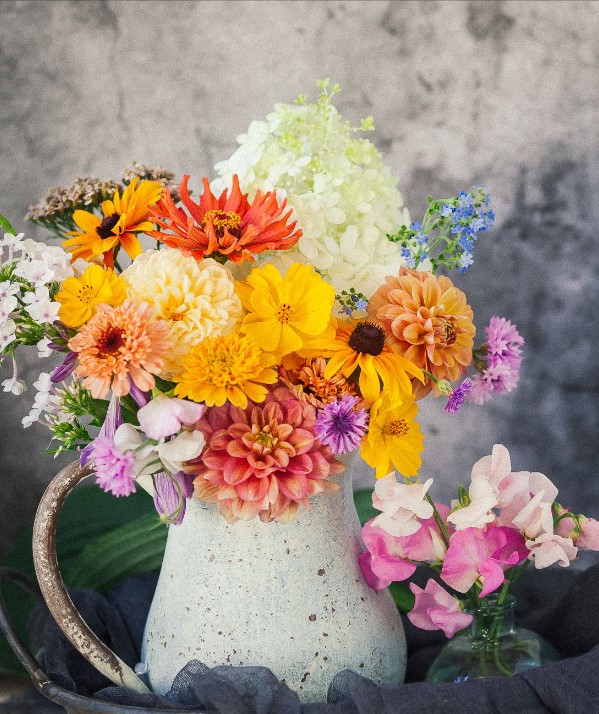
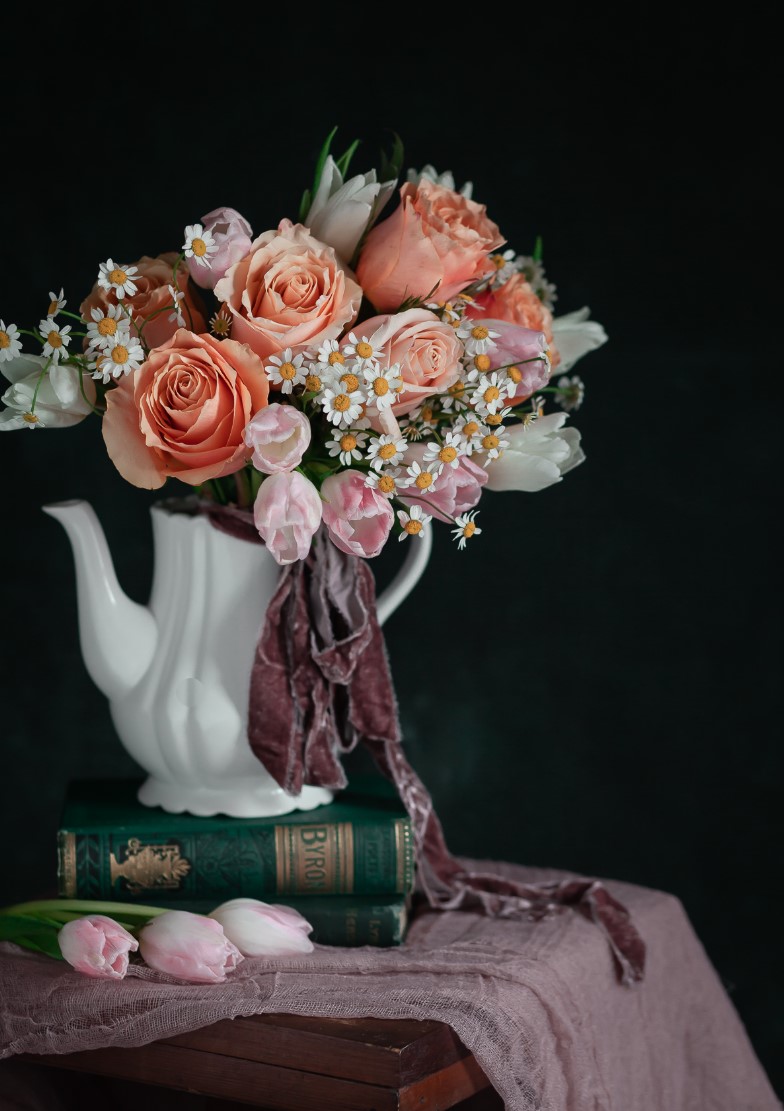
Resulting shot after the arrangement was finished:
Don’t have a room divider or something similar? No worries, you can use a propped up board to the same effect, like so:
Resulting shot:
Photography set ups don’t need to be fussy, or well-prepared. They do need to serve two important functions, though: they should provide good light for your subject and they should provide a stable surface for you to stage your item. Everything else is just window dressing. Whether you’re setting up your mighty harvest or precious pots on a makeshift table of a plank and set of cinder blocks or putting it on a marble tabletop, it doesn’t matter as long as it has sufficient light and is stable enough for you to take a clear, sharp photo.